toggle menu

My Blogs

MY Profile

Stephen G. Vinuya
Aug 17,2019

Creating a particle system using ES6 and p5.js


In this article, we are going to explore what a particle system is and how to create them in HTML5 using p5.js.


First, let's define and know what a particle system is.


Particle System is a term coined by William T. Reeves.

William "Bill" Reeves Pixar.jpg

William "Bill" Reeves (born May 5, 1959) is a Canadian animator and technical director known for working with John Lasseter on the animated shorts Luxo Jr. and The Adventures of Andre and Wally B.

Reference: https://en.wikipedia.org/wiki/William_Reeves_(animator)


According to Wikipedia :

particle system is a technique in game physics motion graphics, and computer graphics that uses a large number of very small sprites3D models, or other graphic objects to simulate certain kinds of "fuzzy" phenomena, which are otherwise very hard to reproduce with conventional rendering techniques - usually highly chaotic systems, natural phenomena, or processes caused by chemical reactions.

- According to Allen Martin here

The term, particle system is loosely defined in computer graphics. It has been used to describe modeling techniques, rendering techniques, and even types of animation


For me, Particle System is a group of particles banded together to give users feedback or emphasis based on the action they have made.


So you might be wondering what does a particle system looks like?


Image result for wondering


This is one of the pictures that I got from google, that best describes what a particle system is.

Image result for particle system in games

Now you might be thinking how does this weird looking animation or graphics, can be used?


Here's a sample video on what it looks when a game doesn't have a particle system:


If we see it the game looks bland and boring.


But if we add a particle system to it, it should look like this:


Now that we know what a particle system is. Let's create our own Particle System!

Image result for excited


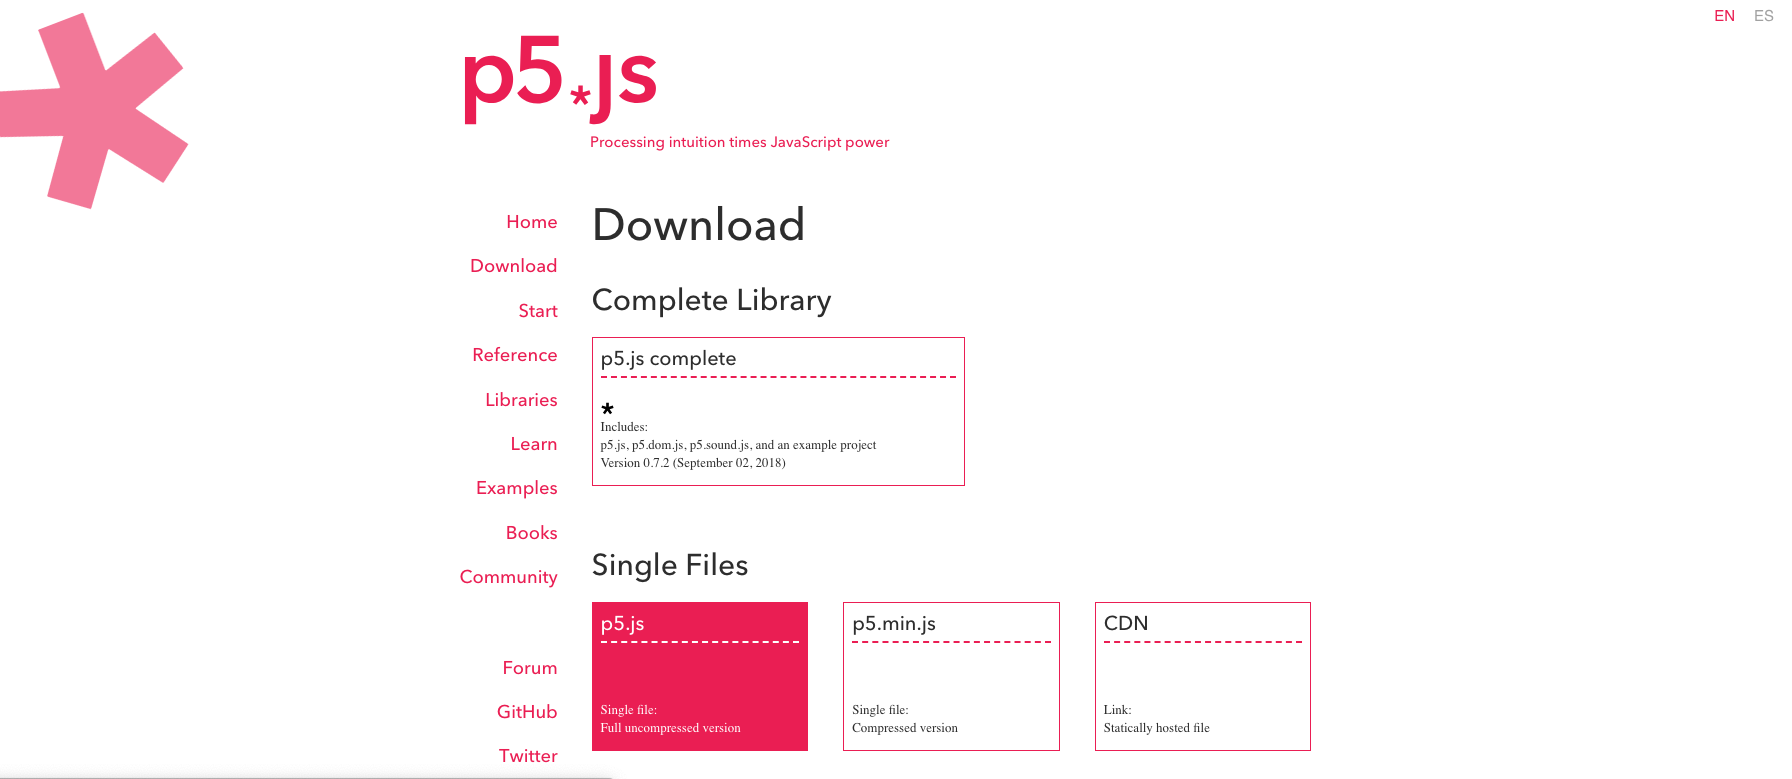
First, let us download p5.js here


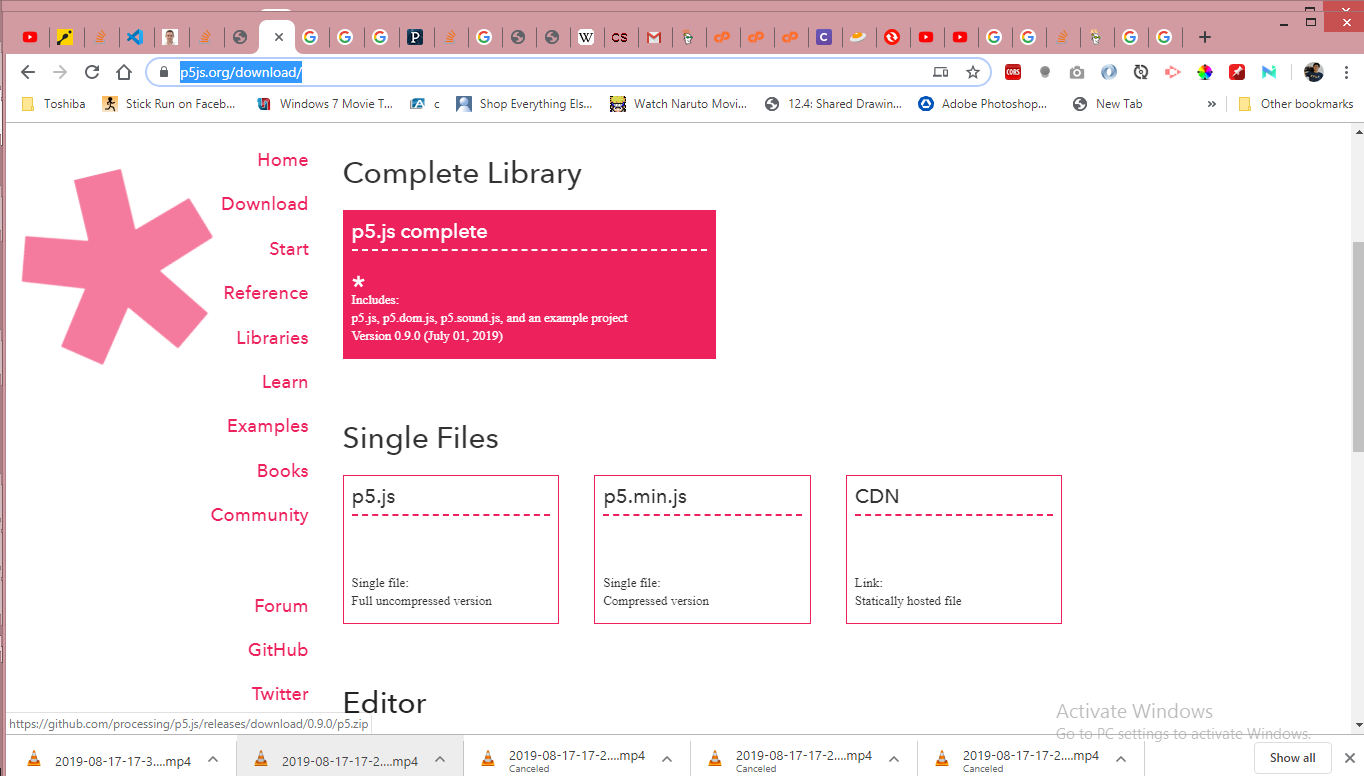
Under the Single Files, section click p5.js.

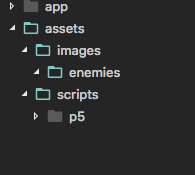
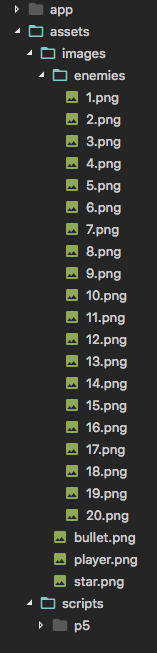
After that let's create our project folder, and paste the p5.js, downloaded file inside the project folder

After that create 2 files, named: index.html and sketch.js, then open the project folder inside our text editor.

The contents should be like this:


Let's now put contents inside our index.html:


<html lang="en">

<head>
<meta charset="UTF-8/">
<meta name="viewport" content="width=device-width, initial-scale=1.0"/>
<meta http-equiv="X-UA-Compatible" content="ie=edge"/>
<title>Documenttitle>
>

<body>

<script src="p5.js"></script>
<script src="sketch.js"></script>
body>

html>


index.html's inside this file, we just need to reference our 2 javascript files.

Now let's proceed writing our p5.js codes

Inside our sketch.js file, write these codes:

function setup() {
createCanvas(innerWidth, innerHeight);
}

function draw() {
background(0);
}


Now let's discuss the two functions that we see on the screen:

  • setup - is being called once after the p5.js has been loaded
  • draw - is being called every frame after setup function has been called, p5.js by default has 60 frames per second meaning that draw is being called 60 times per second.

createCanvas - creates a canvas on our screen, with set width and height, by default we are setting it as the width and height of our browser's window.

background - defines the color of our canvas, 0 denotes that we have a black background.


Before creating our particle system, what properties should a particle system contain?

According to William T. Reeves each particle in the particle system should have the following properties

  • Position - (x, y, z) position of the particle system in computer screen
  • Velocity - denotes the speed and the direction of the particle system
  • Color - color of each particles
  • Lifetime - time when all particles should disappear 
  • Age - number that alters particle's size and transparency
  • Shape - shape of the particle
  • Size -  size of the paritcle
  • Transparency - opacity value of each particles


Now let's create our particle class having these properties, using ES6 class.

Create a new file named particle.js, and put the contents below:

class Particle {

constructor(pos, vel, col, life, shape, size, opacity, force) {
this.pos = pos; // Position
this.vel = vel; // Velocity
this.col = col; // Color
this.life = life; // Lifetime
this.shape = shape; // Shape p5.js 2d only supports rect and ellipse
this.size = size; // size
this.opacity = opacity; // transparency
    this.force = force; // additional property for adding gravity
}

}


After that let's import our particle.js file into our index.html

<script src="p5.js"></script>
<script src="sketch.js"></script>
<script src="particle.js"></script>


Now let's create a function to display our particle class.

class Particle {

constructor(pos, vel, col, life, shape, size, opacity, force) {
this.pos = pos;
this.vel = vel;
this.col = col;
this.life = life;
this.origLife= life; // saves the originally set life variable
this.shape = shape;
this.size = size;
this.opacity = opacity;
this.force = force;
}

render() {
push(); // push the state
translate(this.pos.x, this.pos.y); // translate the current screen position to x, y
stroke(this.col, this.opacity); // stroke color and its transparency
noFill(); // inidicates that our shape should have no fill color inside

if (this.shape === 'rect') {
rect(0, 0, this.size.x, this.size.y); // for displaying rect takes, x, y, width, height
} else {
ellipse(0, 0, this.size.x, this.size.y); // for displaying ellipse takes, x, y, width, height
}

pop(); // pops our state
}

}


Now let's create the Particle class inside our sketch.js

let particle;

function setup() {
createCanvas(innerWidth, innerHeight);

particle = new Particle(
createVector(width / 2, height / 2), // position at the center of the window
createVector(0, 1), // velocity
color(255, 87, 120), // color
100, // lifetime
'rect', // shape
createVector(15, 15), // size width and height
255, // transparency from 0 to 255
createVector(0, 0) // force
);
}

function draw() {
background(0);
particle.render(); // display the particle
}


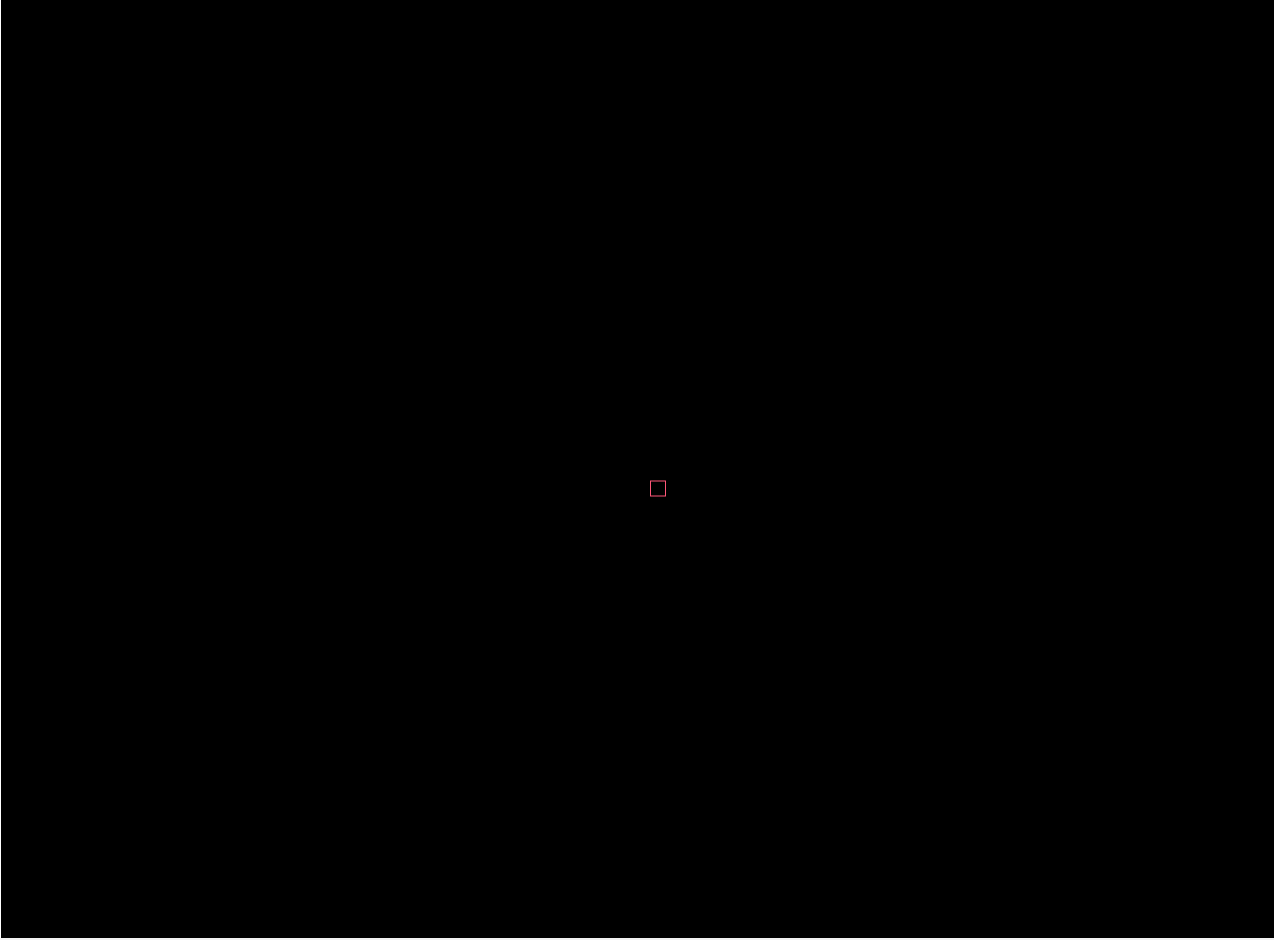
After we reload our page we should see something like this:


Now let's make our particle move or be animated.


class Particle {

constructor(pos, vel, col, life, shape, size, opacity, force) {
this.pos = pos;
this.vel = vel;
this.col = col;
this.life = life;
this.origLife = life;
this.shape = shape;
this.size = size;
this.opacity = opacity;
this.force = force;
}

render() {
push();
translate(this.pos.x, this.pos.y);
stroke(this.col, this.opacity);
noFill();

const lifePercentage = this.life / this.origLife;

if (this.shape === 'rect') {
rect(0, 0, this.size.x * lifePercentage, this.size.y * lifePercentage);
} else {
ellipse(0, 0, this.size.x * lifePercentage, this.size.y * lifePercentage);
}

pop();
}

update() {
this.vel.add(this.force);
this.pos.add(this.vel);
this.vel.limit(3); // limits the velocity speed to 3
this.life--; // decrements life as time passes
this.opacity = map(this.life, 0, this.origLife, 0, 255); // age opacity as life decreases
}

isDead() {
return this.life <= 0;
}

}


Let's discuss the codes here one by one. 

Update():

update() {
this.vel.add(this.force);
this.pos.add(this.vel);
this.vel.limit(3); // limits the velocity speed to 3
this.life--; // decrements life as time passes
this.opacity = map(this.life, 0, this.origLife, 0, 255); // age opacity as life decreases
}


add - adds two vector together, these two lines are responsible for acceleration and movement of our particle.

this.vel.add(this.force);
this.pos.add(this.vel);


As you have noticed we don't have yet the age property of the particle that according to William T. Reeves, should have.

These two lines of code are responsible for that:

As we defined earlier age, defines the alteration of transparency and size of a particle

This line of code denotes the shrinkage of a particle as life decreases.


const lifePercentage = this.life / this.origLife; // gets the life percentage

if (this.shape === 'rect') {
rect(0, 0, this.size.x * lifePercentage, this.size.y * lifePercentage);
} else {
ellipse(0, 0, this.size.x * lifePercentage, this.size.y * lifePercentage);
}

This line of code denotes the decrease of opacity value of a particle as life decreases.

this.life--; // decrements life as time passes
this.opacity = map(this.life, 0, this.origLife, 0, 255); // age opacity as life decreases


After that let's call the Particle class' update function inside our sketch.js class.

function draw() {
background(0);
particle.update();
particle.render();
}


Now we should be able to see something like this: 


Cool, now let's move to create our ParticleSystem class, it would be responsible for creating multiple particles and animating them.

Create a new file named particle-system.js, and put the contents below:

class ParticleSystem {

constructor(pos, life, size, opacity, force, count, generationSpeed) {
this.pos = pos;
this.life = life;
this.origLife = life;
this.size = size;
this.opacity = opacity;
this.force = force;
this.count = count;
this.generationSpeed = generationSpeed;
this.particles = [];
this.generateParticles();
}

generateParticles() {
this.particles = [
...Array(this.count).fill(1).map(n => new Particle(
this.pos.copy(),
createVector(random(-1, 1), random(-1, 1)),
color(random(180, 255), random(100, 255), random(100, 255)),
this.life,
random(['rect', 'ellipse']),
this.size,
this.opacity,
this.force
)),
...this.particles
]
}

update() {
this.particles = this.particles.filter(p => !p.isDead());
if (frameCount % this.generationSpeed === 0) {
this.generateParticles();
}
}

render() {
this.particles.forEach(p => {
p.update();
p.render();
});
}
}


Let's discuss the codes here one by one. 

We have added here two new properties inside the particle-system.js:

  • generationSpeed - frame speed when should we create number of particles.
  • count - n number of particles per generation 

For the following codes, I will explain it's use thru comments

generateParticles():

generateParticles() {
this.particles = [
...Array(this.count).fill(1).map(n => new Particle(
this.pos.copy(), // copy function clones the position object to avoid reference copy to the source
createVector(random(-1, 1), random(-1, 1)), // creates random velocity between -1,1
color(random(180, 255), random(100, 255), random(100, 255)), // creates random reddish color
this.life,
random(['rect', 'ellipse']), // selects a random shape between rect or ellipse
this.size,
this.opacity,
this.force
)),
...this.particles
] // concatenate two arrays
}


update():

update() {
this.particles = this.particles.filter(p => !p.isDead());// checks if particle is dead and remove it in array
if (frameCount % this.generationSpeed === 0) { // check if the current frameCount is in generationSpeed
this.generateParticles();
}
}


After that let's import our particle-system.js file inside our index.html:

<script src="p5.js"></script>
<script src="sketch.js"></script>
<script src="particle.js"></script>
<script src="particle-system.js"></script>


And now let's create a particle system every mouse click.

Let's update our sketch.js file:

let particleSystems = []; // Holds the particle system that we will create

p5.disableFriendlyErrors = true; // for optimization

function setup() {
createCanvas(innerWidth, innerHeight);
}

function draw() {
background(0);
renderParticleSystem(); // displays particle system
}

function mousePressed() {
particleSystems.push(
new ParticleSystem(
createVector(mouseX, mouseY),// creates particle system based mouse location
80, // particle dies every 80th frame
createVector(10, 10), // size
255, // transparency 255
createVector(0, -0.05), force make the particle going up
10, // count of particle per generation
10 // number of frames per generation
)
);
}

function renderParticleSystem() {
particleSystems.forEach(pS => {
pS.update();
pS.render();
});
}


After that, it should look like this:


Cool, now we're done, you are free to use the codes and use them.


Image result for accomplished picture 


Try it https://www.openprocessing.org/sketch/745356

Download the code: https://github.com/onecompileman/particle-system


Read More
MY Profile

Stephen G. Vinuya
Dec 19,2018

Making a Simple Space Shooter using p5.js and ES6 part 3


This is the continuation of the part of this article series about "Making a Simple Space Shooter using p5.js and ES6".


What we have accomplished so far is to make the Player class fire bullets and to generate Enemies.


Next is let's make the game re initialize when, an Enemy collide with the Player.


1. Gameover function

renderPlayer() {
this.player.pos.x = constrain(mouseX, this.player.size.x / 2, width - (this.player.size.x / 2));
this.player.update();
this.player.show();

const bullet = this.player.fireBullet(this.assetManager.bulletImg);
if(bullet) {
this.bullets.push(bullet);
}

if (this.enemies.reduce((acc, e) => acc || e.isCollided(this.player.pos, this.player.size),false)) {
this.init();
}
}


We have updated the our renderPlayer()  to check if it has collided to an enemy, then repeat the game otherwise continue.


2. Stars and score

On the popular Messenger game Everwing, player earns score, when he/she catches the falling coins.  Let's make our own version of it using stars as alternative to coins.


Let's update our GameManager class, init() method :

init() {
this.bullets = [];
this.enemies = [];
this.enemyGenerateSpeed = 200;
this.enemySpeed = 2;
this.stars = [];
this.score = 0;
this.player = new Player(
createVector(width / 2, height - 100),
createVector(0, 0),
this.assetManager.playerImg,
createVector(75, 75),
100,
'player'
);
}


We have added two new variables in the init() function:

- stars - will contains all the stars that is currently in the canvas.

- score - will the count of stars that the player catches


Let's now update our renderEnemies method inside the GameManager class, to create a star every time an enemy dies.

renderEnemies() {
this.enemies.forEach(e => {
e.update();
e.show();
});

this.enemies = this.enemies.filter(e => {
let isDead = e.life < 0;
if (isDead) {
this.stars.push(new GameObject( // creates a new star and push it in the stars array
e.pos,
createVector(random(-1, 1), random(3, 6)), // random velocity
this.assetManager.starImg,
createVector(25, 25),
60,
'star'
))
}
return !isDead;
});
}


After that, we just need to show the stars by creating a new method inside GameManager class named renderStars(), it shows and updates star's position and also check if the star collided to the player

remove the star and increments the score.

renderStars() {
this.stars.forEach(s => {
s.update();
s.show();
});

this.stars = this.stars.filter(s => {
const isCollided = s.isCollided(this.player.pos, this.player.size);
this.score += (isCollided) ? 1 : 0; // increments the score if the player has collided to the star
return !isCollided;
});
}


Let's now create a new method on our GameManager class named renderScore(), to display the score :


renderScore() {
push();
translate(10, 10);
image(this.assetManager.starImg, 0, 0, 30, 30);
fill(255);
textSize(30);
text(`: ${this.score}`, 40, 28);
pop();
}


Now we are all set, let's call all the new methods we have added, in the update method of our GameManager class:

update() {
this.renderPlayer();
this.renderBullets();
this.renderEnemies();
this.generateEnemy();
this.renderStars();
this.renderScore();
}


Our GameManager class now should look like this: 

class GameManager {

constructor() {
this.assetManager = new AssetManager();
}

init() {
this.bullets = [];
this.enemies = [];
this.enemyGenerateSpeed = 200;
this.enemySpeed = 2;
this.stars = [];
this.score = 0;
this.player = new Player(
createVector(width / 2, height - 100),
createVector(0, 0),
this.assetManager.playerImg,
createVector(75, 75),
100,
'player'
);
}

loadAssets() {
this.assetManager.preload();
}

update() {
this.renderPlayer();
this.renderBullets();
this.renderEnemies();
this.generateEnemy();
this.renderStars();
this.renderScore();
}

renderBullets() {
this.bullets.forEach(b => {
b.update();
b.show();
});

this.bullets = this.bullets.filter(b => {
let isCollided = false;

this.enemies = this.enemies.map(e => {

if (!isCollided && b.isCollided(e.pos, e.size)) {
e.life -= this.player.damage;
isCollided = true;
}
return e;
});

return !(b.pos.y < 0 || isCollided);
});
}

renderPlayer() {
this.player.pos.x = constrain(mouseX, 37.5, width - 37.5);
this.player.update();
this.player.show();

const bullet = this.player.fireBullet(this.assetManager.bulletImg);
if (bullet) {
this.bullets.push(bullet);
}
}

generateEnemy() {
if (frameCount % this.enemyGenerateSpeed === 0) {
const enemyCount = random(2, 6);
let posX = [0, 1, 2, 3, 4, 5];

[...Array(parseInt(enemyCount)).keys()].forEach(a => {
let xIndex = posX.splice(parseInt(random(0, posX.length - 1)), 1)[0];

this.enemies.push(new GameObject(
createVector((xIndex * 75) + 37.5, 0 - 75),
createVector(0, this.enemySpeed),
random(this.assetManager.enemiesImg),
createVector(70, 70),
60,
'enemy'
));
})

}
}

renderEnemies() {
this.enemies.forEach(e => {
e.update();
e.show();
});

this.enemies = this.enemies.filter(e => {
let isDead = e.life < 0;
if (isDead) {
this.stars.push(new GameObject(
e.pos,
createVector(random(-1, 1), random(3, 6)), // random velocity
this.assetManager.starImg,
createVector(25, 25),
60,
'star'
))
}
return !isDead;
});
}

renderStars() {
this.stars.forEach(s => {
s.update();
s.show();
});

this.stars = this.stars.filter(s => {
const isCollided = s.isCollided(this.player.pos, this.player.size);
this.score += (isCollided) ? 1 : 0;
return !isCollided;
});
}

renderScore() {
push();
translate(10, 10);
image(this.assetManager.starImg, 0, 0, 30, 30);
fill(255);
textSize(30);
text(`: ${this.score}`, 40, 28);
pop();
}

}


After we run our game it will look like this:


And that concludes our article series.


Source File: https://github.com/onecompileman/sample-space-shooter


Read More
MY Profile

Stephen G. Vinuya
Dec 19,2018

Making a Simple Space Shooter using p5.js and ES6 part 2


This is the continuation of the part 1 of this article series about "Making a Simple Space Shooter using p5.js and ES6".


What we have accomplished so far is to create our GameManager class and make our Player object move to the canvas.


To continue let's make our player fire bullets.


1. Firing Bullets


Let's add a fireBullet() function to our Player class.

class Player extends GameObject {

constructor(pos, vel, img, size, life, tag) {
super(pos, vel, img, size, life, tag);
this.fireRate = 10;
this.damage = 20;
this.bulletSpeed = 15;
}

fireBullet(bulletImg) {
return (frameCount % this.fireRate === 0) ? new GameObject(
createVector(this.pos.x, this.pos.y - (this.size.y / 2)), // position
createVector(0, -this.bulletSpeed), // velocity
bulletImg, // image asset
createVector(5, 12), // size
100, // life
'bullet' // tag
) : null;
}

}


-fireBullet() - takes bulletImg image as an argument that is defined in our AssetManager class

-  (frameCount % this.fireRate === 0)  it will only fire every frameCount that is divisible every frameRate we defined, otherwise return null meaning no bullet will be fired at that moment

- We are using this.bulletSpeed  in negative as our y velocity since the bullet will be pointing upwards


Now let's update our GameManager class 

class GameManager {

constructor() {
this.assetManager = new AssetManager();
}

init() {
this.bullets = [];
this.player = new Player(
createVector(width / 2, height - 100),
createVector(0, 0),
this.assetManager.playerImg,
createVector(75, 75),
100,
'player'
);
}

loadAssets() {
this.assetManager.preload();
}

update() {
this.renderPlayer();
this.renderBullets();
}

renderBullets() {
this.bullets.forEach(bullet => {
bullet.update();
bullet.show();
});

this.bullets = this.bullets.filter(b => !(b.pos.y < 0));
}

renderPlayer() {
this.player.pos.x = constrain(mouseX, 37.5, width - 37.5);
this.player.update();
this.player.show();

const bullet = this.player.fireBullet(this.assetManager.bulletImg);
if (bullet) {
this.bullets.push(bullet);
}
}

}


On the GameManager init, we added this.bullets = [];, to hold all of our bullets in the game.

- renderBullets() - show and updates all the bullets in the screen

this.bullets = this.bullets.filter(b => !(b.pos.y < 0));    -removes all the bullets that are leaving the screen to prevent memory leak

- We have updated renderPlayer() to invoke Player's fireBullet() function on every function call, and only add the bullet if it is not null


After running the game, we can see an output like this:


Cool now we have a Player firing bullets, next to create our enemies.


2. Enemies and Collision

Before we create our enemy class, let's add a collision detection on our GameObject class.


isCollided(gameObjPos, gameObjSize) {
return ((gameObjSize.y + this.size.x) / 2) > (this.pos.dist(gameObjPos));
}


We are checking here if the distance from gameObject's position we are comparing it with, is less than the combination of two sizes of both gameObject, then it is colliding with each other, it will return true.


Let's now update our GameManager class. 

class GameManager {

constructor() {
this.assetManager = new AssetManager();
}

init() {
this.bullets = [];
this.enemies = [];
this.enemyGenerateSpeed = 200;
this.enemySpeed = 2;
this.player = new Player(
createVector(width / 2, height - 100),
createVector(0, 0),
this.assetManager.playerImg,
createVector(75, 75),
100,
'player'
);
}

loadAssets() {
this.assetManager.preload();
}

update() {
this.renderPlayer();
this.renderBullets();
this.renderEnemies();
this.generateEnemy();
}

renderBullets() {
this.bullets.forEach(b => {
b.update();
b.show();
});

this.bullets = this.bullets.filter(b => {
let isCollided = false; // variable to check if the player is yet to collide to an enemy

this.enemies = this.enemies.map(e => {

if (!isCollided && b.isCollided(e.pos, e.size)) {// only check if the bullet has collided or not
e.life -= this.player.damage; //if the bullet has collided to an enemy subtract player damage to enemy life
isCollided = true; //set the collision to true
}
return e;
});

return !(b.pos.y < 0 || isCollided); // removes enemies that is out of the canvas and whose life is 0
});
}

renderPlayer() {
this.player.pos.x = constrain(mouseX, 37.5, width - 37.5);
this.player.update();
this.player.show();

const bullet = this.player.fireBullet(this.assetManager.bulletImg);
if (bullet) {
this.bullets.push(bullet);
}
}

generateEnemy() {
if (frameCount % this.enemyGenerateSpeed === 0) {
const enemyCount = random(2, 6); // random enemy count 2-6
let posX = [0, 1, 2, 3, 4, 5]; // x positions for the enemies to be generated

[...Array(parseInt(enemyCount)).keys()].forEach(a => {
let xIndex = posX.splice(parseInt(random(0, posX.length - 1)), 1)[0];
               // removes an element in posX variable, indicates that position is taken and to avoid overlapping
                

this.enemies.push(new GameObject(
createVector((xIndex * 75) + 37.5, 0 - 75),
// multiply the zIndex by 75 since 75 is the width of the enemy
createVector(0, this.enemySpeed),
random(this.assetManager.enemiesImg),
createVector(70, 70),
60,
'enemy'
));
})

}
}

renderEnemies() {
this.enemies.forEach(e => {
e.update();
e.show();
});

this.enemies = this.enemies.filter(e => !(e.life <= 0 || e.pos.y > height));
}


}


We have added 3 new variables  on init() method:

- enemies - to hold all the enemies that is within the game canvas

- enemyGeneration - number value that indicates for every nth frame we are creating a new set of enemies

- enemySpeed -  indicates how fast the enemy should move.


New methods:

- renderEnemies() - shows and update the enemies' position

this.enemies = this.enemies.filter(e => !(e.life <= 0 || e.pos.y > height)); -  removes the enemy whose life is 0 or is out of the canvas.

- generateEnemy() - generates set on enemies on random position and random in count, that is based on the enemyGeneration variable


We have updated also the renderBullets() function to check if a bullet has collided to an enemy, if it has collided remove the bullet and subtracts player damage to enemy that has been hit.


After running our game again we can see this output: 


Cool! now it looks like a game now.

That ends our part 2 of this article series. 

Next Article: http://onecompileman.com/blogs/6


Read More
MY Profile

Stephen G. Vinuya
Dec 11,2018

Making a Simple Space Shooter using p5.js and ES6 part 1


In this article series, we are going to create a Simple Space Shooter game in HTML5 using p5.js. 


We are going to use p5.js, a Javascript library for rendering web animations in Canvas.

To get started let us download click here.    


Select Complete Library > p5.js complete. 


We will use Kenney's Space Shooter Redux as our main game assets for this simple game, to download, click here.


Since we are using images to run in p5.js , we need to run it in a server, make sure that any version of MAMP, WAMP, or XAMPP is installed.


Once we have all the things we need to make our game, let's now get started.


1. Game Folder Structure

First let's make create our game folder and named it space-shooter.

After that let's create our the folders and files needed in our game.

Here's what our game folder should look like:

- app - will contain all our game scripts 

- assets - will contain all of our game assets and 3rd party scripts like p5.js


Next step is to move Kenney's Space Shooter Redux asset, into our game folder.

If we open it, we'll see all the assets inside it.


Here's the list of files that we will use and should it be named on to our app.

- PNG > playerShip1_red.png => assets > images > player.png

- PNG > Lasers > laserBlue01.png => assets > images > bullet.png

- PNG > Power-ups > star_gold.png => assets > images > star.png

- PNG > Enemies > [All Files Inside] => assets > images > enemies > [All file number 1.png to 20.png]


Our folder structure now should be: 


After that we are now done with the game's folder structure .


2. Setting up game scripts 

Let's now create our index.html file.

DOCTYPE html>
<html lang="en">
<head>
<meta charset="UTF-8">
<meta name="viewport" content="width=device-width, initial-scale=1.0">
<meta http-equiv="X-UA-Compatible" content="ie=edge">
<title>Space Shootertitle>
<style>
body {
display: flex;
justify-content: center;
}
</style>
head>
<body>
<script src="assets/scripts/p5/p5.min.js"></script>
<script src="scripts/sketch.js"></script>
body>
html>


After that let's now create our main script for running all p5's main functions, sketch.js,  app > sketch.js 

function preload() {

}

function draw() {
background(0);
}

function setup() {
createCanvas(450, window.innerHeight);
}


- preload() is a p5.js function that runs before setup, it is usually used for preloading all the assets(images, sounds, etc) inside the game

- draw() is a p5.js function that runs every frame, in p5.js it runs on 60 fps, so this function will be called 60 times every second.

- setup() is a p5.js function that is mainly used for initializing variables, creating canvas.

-createCanvas() is a p5.js function that will create the canvas where our game will run.

- background() is a p5.js function used for setting the canvas color.


Let's now reference, the sketch.js file on to our index.html.

<script src="assets/scripts/p5/p5.min.js"></script>
<script src="app/sketch.js"></script>


and now let's run the app by entering this command on VS code's terminal :

php -S localhost:8000

After running our game, we can see a blank black canvas on our window:


3. Asset Manager

Let's now load all the assets in our app, create app > asset-manager.js.

class AssetManager {
preload() {
this.playerImg = loadImage('assets/images/player.png');
this.bulletImg = loadImage('assets/images/bullet.png');
this.starImg = loadImage('assets/images/star.png');

this.enemiesImg = [...Array(20).keys()].map(a => loadImage(`assets/images/enemies/${a + 1}.png`));
}

}


- loadImage() - will load the image based on the path provided in the parameter, and returns p5.Image object
[...Array(20).keys()] - this code is the ES6 alternative for   for (let i = 0; i < 20; i++)  

Let's now reference, the asset-manager.js file on to our index.html.

<script src="assets/scripts/p5/p5.min.js"></script>
<script src="app/sketch.js"></script>
<script src="app/asset-manager.js"></script>


4. Game Manager and Game Object

Let's now create a GameObject class that will be the parent class of all our game entities.


class GameObject {
constructor(pos, vel, img, size, life, tag) {
this.pos = pos;
this.vel = vel;
this.img = img;
this.size = size;
this.life = life;
this.tag = tag;
}

show() {
push();
imageMode(CENTER);
translate(this.pos.x, this.pos.y);
image(this.img ,0 ,0 ,this.size.x, this.size.y);
pop();
}

update() {
this.pos.add(this.vel);
}

}

- Our GameObject class will keep track of :
  -position (pos) - x,y coordinates of the object in the canvas

  -velocity (vel) - keeps track of the x, y movement of the object in the canvas.

  - image (img) - the sprite image of the game object from the AssetManager class.

  - size (size) - the width and height size of the game object

  - life (life) - keeps track of the life of game object

  - tag (tag) - tag name to keep track on what time of game object is created.


GameObject's methods:

 - show() - render the game object inside the canvas.

   - push and pop - is a p5.js function that indicates start and end of positioning.

   - imageMode - takes parameter CORNER, CENTER ,CORNERS,  for displaying the image

   - translate - takes two parameter (x, y) to position the image.

   - image - displays the image in the canvas.

- update() - updates game object position in the canvas

   this.pos.add(this.vel) - adds the velocity to make the game object move.


Let's now reference, the game-object.js file on to our index.html.

<script src="assets/scripts/p5/p5.min.js"></script>
<script src="app/sketch.js"></script>
<script src="app/asset-manager.js"></script>
<script src="app/game-object.js"></script>


Now let's create our player class.

class Player extends GameObject {

constructor(pos, vel, img, size, life, tag) {
super(pos, vel, img, size, life, tag);
this.fireRate = 10;
this.damage = 20;
this.bulletSpeed = 15;
}
}
}


It will extend the GameObject class, and add these properties: 

 -  fireRate - in every frames our player will shoot bullets

 - damage - variable that indicates the player damage to enemies

- bulletSpeed - speed of the bullet that will traverse through the canvas


Let's now reference, the player.js file on to our index.html.

<script src="assets/scripts/p5/p5.min.js"></script>
<script src="app/sketch.js"></script>
<script src="app/asset-manager.js"></script>
<script src="app/game-object.js"></script>
<script src="app/player.js"></script>


Now let's create a GameManager class to manage all of our game objects.
class GameManager {

constructor() {
this.assetManager = new AssetManager();
}

init() {
this.player = new Player(
createVector(width / 2, height - 100),
createVector(0, 0),
this.assetManager.playerImg,
createVector(75, 75),
100,
'player'
);
}

loadAssets() {
this.assetManager.preload();
}

update() {
this.renderPlayer();
}

renderPlayer() {
this.player.pos.x = constrain(mouseX, 37.5, width - 37.5);
this.player.update();
this.player.show();
}

}


- init() - will be called when the game starts, we will instantiate the player, with 0,0 velocity, cause we want the mouse to make the movement for the player

- loadAssets()  - will be called on p5 preload() function, to load all the assets that will be used in our game

- update() -will call all the game objects and render them one by one.

- renderPlayer() - will be called every update and player will follow the mouse position in the screen clamped at playerWidth / 2 and width - playerWidth / 2

 
And now let's update our sketch.js file, to call respective gameManager methods in each p5.js lifecycle methods.

let gameManager;

function preload() {
gameManager = new GameManager();
gameManager.loadAssets();
}

function draw() {
background(0);
gameManager.update();
}

function setup() {
createCanvas(450, window.innerHeight);
gameManager.init();
}


After we run our game we can see this :


Cool, now we can see our player moving.

That concludes our part 1 of this article series.

Next Article: http://onecompileman.com/blogs/6


Read More
MY Profile

Stephen G. Vinuya
Dec 07,2018

Solving Code Wars Problem in Javascript (ES6) [6th Kyu]


In this article we are going to solve 2 Codewars' [6th kyu ] problems using Javascript (ES6) and  discuss approaches how problems can be solved .

Codewars is a great site for improving your problem solving skills and it's also great for discovering different approaches of other developers in solving each problems.

Problems at code wars are label by difficulty as kyu, [1st kyu] being the hardest and [8th kyu] being the easiest.


Let's now start with our first problem.


1. Matrix Addition

Codewars link: https://www.codewars.com/kata/matrix-addition/train/javascript

The problem is :


Write a function that accepts two square matrices (N x N two dimensional arrays), and return the sum of the two. Both matrices being passed into the function will be of size N x N (square), containing only integers.

How to sum two matrices:

Take each cell [n][m] from the first matrix, and add it with the same [n][m] cell from the second matrix. This will be cell [n][m] of the solution matrix.

Visualization:

|1 2 3| |2 2 1| |1+2 2+2 3+1| |3 4 4|
|3 2 1| + |3 2 3| = |3+3 2+2 1+3| = |6 4 4|
|1 1 1| |1 1 3| |1+1 1+1 1+3| |2 2 4|


The solution:

Non ES6 approach: 


function matrixAddition(a, b) {
var m = []; // Matrix var for the sum of a + b
for (var r = 0; r < a.length; r++) {
m.push([]); // adds 1d array into the array to make it 2d
for (var c = 0; c < a[r].length; c++) {
m[r].push(a[r][c] + b[r][c]); // sum of each cell in a and b matrix
}
}

return m;
}


We have created m as the variable that will hold the sum of cells in both a and b in same row and col.

And every row iteration we are adding an empty 1d array to m, so that we can store the sum of same cells for both a and b.


And would you believe the approach above can be reduced into a single line of code?


ES6 Approach: 


const matrixAddition = (a, b) => a.map((a1, r) => a1.map((a2, c) => a2 + b[r][c]));


In this approach we have used arrow function of Javascript, to omit the function() keyword, to make it more shorter.

Also using arrow function would omit the return keyword.

We have used map here to mutate the matrix's value, and we have another inner map since we are dealing with 2d  array here.

Same as our solution above we have  and c which denotes the row and column of the cells we are adding .


2. Find the unique number

Codewars link: https://www.codewars.com/kata/find-the-unique-number-1/train/javascript

The problem is :

There is an array with some numbers. All numbers are equal except for one. Try to find it!

findUniq([ 1, 1, 1, 2, 1, 1 ]) === 2
findUniq([ 0, 0, 0.55, 0, 0 ]) === 0.55

It's guaranteed that array contains more than 3 numbers.

The tests contain some very huge arrays, so think about performance.

This is the first kata in series:


The solution:

Non ES6 approach: 

function findUniq(arr) {
var uniqObj = {}; //Stores all unique elements in array

arr.forEach(function (a) {
if (uniqObj.hasOwnProperty(a)) { //checks if the element in array exist already in the object as key
uniqObj[a] = true; // modify its value to true if exists already, meaning its unique
} else {
uniqObj[a] = false; // otherwise initialize it to false
}
});

var keys = Object.keys(uniqObj); // Gets all the keys in the Object

for (var i = 0; i < keys.length; i++) {
if (!uniqObj[keys[i]]) { // checks if the property value if false, if it is then it is unique
return parseInt(keys[i]); // return the key, parsed into integer
}
}
}


uniqObj is a variable that will hold the unique elements in the array as key.


hasOwnProperty() is an Object method that returns a boolean value if the key already exist in the object or not, if it exists we are setting it to true meaning the it is not unique, otherwise initialize it to false.


Object.keys() gets all the keys inside the object needed to iterate into the object values to find false in it, meaning it is a unique number then return the parseInt value of that key.


ES6 Approach: 

const findUniq = (arr) => {
const obj = arr.reduce((acc, a) => {
acc[a] = acc.hasOwnProperty(a);
return acc;
}, {});
return arr.reduce((acc, a) => (!obj[a] ? +a : acc), 0);
}


Uses the same idea as we did above, but instead of declaring a var uniqObj and using forEach to accumulate its value, we used reduce() instead, as well as to finding which key is the only unique number.

Instead of using if in checking to the unique number, we used a ternary operator.

We also change parseInt(strNumber) into +strNumber, which is the shorthand for parsing int.


That ends our article in Solving 6th kyu Codewars problem using ES6.


Check out the 7th kyu version of this article: http://onecompileman.com/blogs/3


Read More